While we do occasionally provide template guides for drilling mounting holes into the drawer or cabinet, most of our customers have opted to handle this task entirely on their own.
In building a set of cabinets for our kitchen the opportunity arose to test my installation skills with a fresh set of Kahoy Crafts wooden drawer pulls. It was surprisingly easy and the template guide I created made for short work of it.
Here are the tools you’ll need for this task
- Cordless drill and 3/16″ drill bit
- Template guide (optional)
- Combination square
- Tape measure
- Spirit level
- Trigger or spring clamp
- Painter’s tape
- Center punch
- Pencil or erasable marker

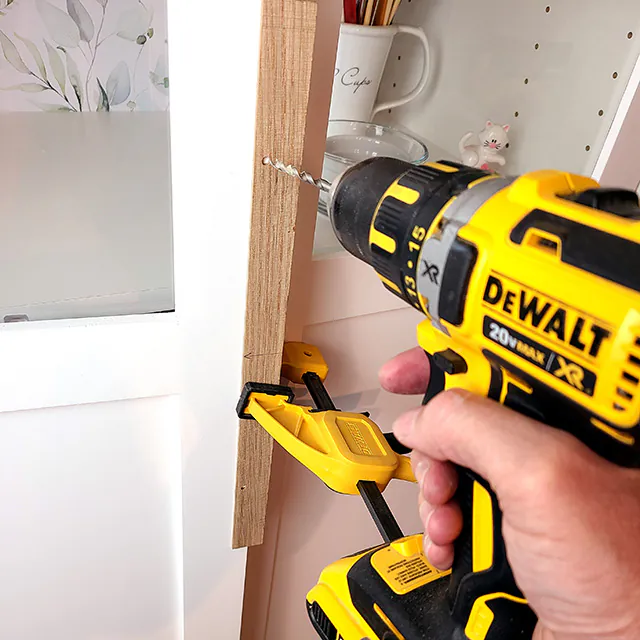
My template guide was fashioned from scrap pieces of oak and has two holes spaced exactly 256 mm apart. A glued-on strip of wood acts as a rail to align the holes 5/16″ from the edge of the cabinet or drawer face. The centerline on the guide is important since that will be used to position the template in the center of the door later. The placement of the handles is largely personal preference, but the middle is always a good starting point.

After the template is prepared, begin by marking the center of the left cabinet door using a pen or pencil. This is where the painter’s tape will come in handy to protect the surface from any blemishes. Now that you have the first line established, extend that centerline to the right door using a spirit or bubble level. This way both handles will be perfectly aligned. I find this method works better than trying to find the center of both doors independently. Again apply tape to protect the surface of the door and make the mark.
Using the template guide, align its center mark to the line on the left door, and clamp it in place. Next, chuck up the bit and drill starter holes with the guide. Now remove the guide and drill the holes all the way through, front to back. Be sure to clamp a scrap 3/4″ board onto the back of the door to prevent tear-out or splinters. Another thing that helps is to squat down a little to confirm that the drill bit is level and perpendicular to the surface before drilling the hole.
At this point, you’ve completed the holes for the first drawer pull, and it’s now a matter of rinse and repeat. Pat yourself on the back for a job well done!